HomeBlogBlogNordic Green Leaf Wall Decals: Calm, Modern Wall Styling

Nordic Green Leaf Wall Decals: Calm, Modern Wall Styling

Nordic Green Leaf Wall Decals: Calm, Modern Wall Styling

Large Nordic Green Leaf Wall Decals for Calm, Modern Rooms

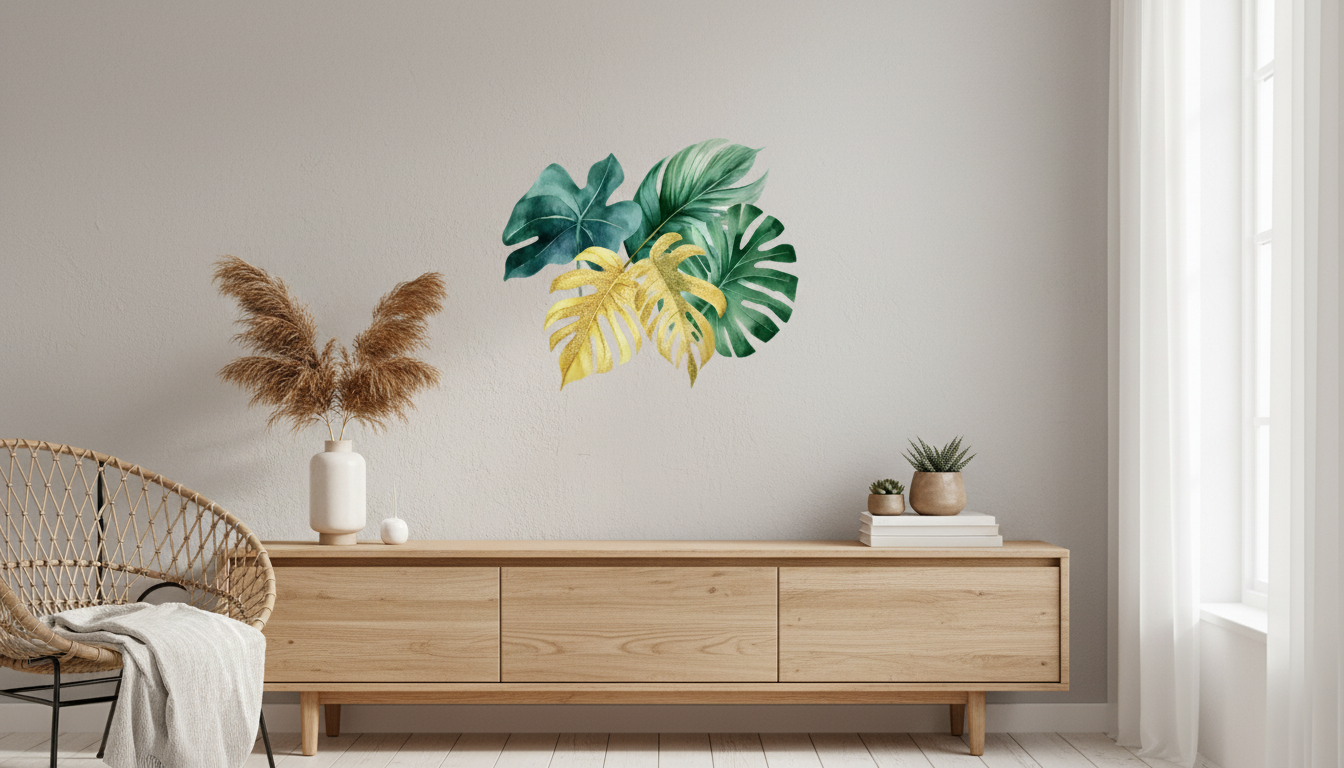
Soft green botanicals and clean Nordic styling can change the feel of a room without paint, drilling, or long projects. Large leaf wall decals add color and shape to blank walls, create a quick focal point behind a bed or sofa, and refresh rentals with minimal commitment. When the design stays simple and the spacing feels intentional, you get that calm “finished” look—without committing to wallpaper or a full mural. For more guidance, see Wool Tapestry | Inca Culture Art Wall Hanging,Home Decor..

What makes Nordic leaf wall decals feel “right” in a space

Nordic-inspired rooms tend to feel light, breathable, and uncluttered. Large green leaf decals fit naturally into that aesthetic when a few key details line up. For further reading, see Lambs & Ivy Bow Wow Wall Decals.

  • Simple silhouettes: Clean leaf shapes read as modern and graphic, so the wall feels styled instead of busy.
  • Balanced spacing: Leaving negative space around each leaf keeps the arrangement airy—especially important on white or light gray walls.
  • Easy mural effect: Large-format decals can mimic a painted feature wall, but they’re far easier to apply and remove.
  • Softening hard lines: Botanicals counterbalance sharp furniture edges and minimal layouts, adding warmth without visual clutter.

Where they look best: room-by-room placement ideas

Large leaf decals are flexible: cluster them for a bold statement, or spread them out for a subtle, Scandinavian-style accent. Use these room-specific placements to keep the result calm and intentional.

  • Bedroom: Create a headboard-style feature by clustering leaves behind the bed, centered to the mattress width.
  • Living room: Place a vertical arrangement beside a media console or behind a reading chair to add height and a natural focal point.
  • Nursery or kids’ room: Keep leaves higher on the wall to reduce picking and to frame a crib or bookshelf.
  • Entryway: A small cluster near a mirror adds a welcoming touch without crowding narrow walls.
  • Home office: Position decals within the video-call background area for a calm, natural backdrop.

Placement guide for a balanced look

Area Recommended layout Quick tip
Behind a bed Wide cluster centered on bed Start from the middle leaf and build outward for symmetry
Above a sofa Loose arc or staggered row Keep the lowest leaf 6–10 in above the backrest
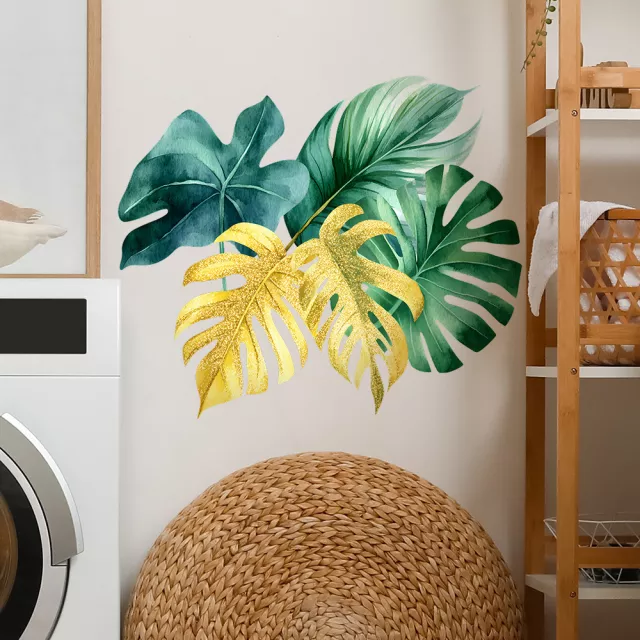
Corner accent Vertical “climbing” pattern Rotate a few leaves to avoid repetition
Around a mirror Half-wreath framing Leave 2–4 in of breathing room from the frame edge
Desk backdrop Tight cluster at eye level Test camera framing before committing

Picking the right wall and surface

Getting crisp edges and long-lasting hold starts with the surface. Most decal “fails” come from texture, dust, or paint that hasn’t fully cured.

  • Best surfaces: Smooth, clean, fully cured painted walls; sealed wood; glass; metal; smooth laminate.
  • Avoid: Heavily textured walls, dusty brick, unsealed plaster, or surfaces with peeling paint.
  • Matte paint note: Matte finishes can be slightly more prone to edge lift. Press edges longer and smooth out air pockets carefully to improve contact.
  • Fresh paint caution: If paint is new, allow adequate curing time before applying decals to reduce lifting risk. Sherwin-Williams explains the difference between “dry” and “cured” paint here: https://www.sherwin-williams.com/.

How to apply for clean edges and a natural arrangement

A little planning keeps the finished wall from looking too symmetrical or too scattered. Aim for “organic” spacing—like leaves naturally drifting upward.

  • Plan the layout: Tape paper cutouts or use painter’s tape to mark a few anchor points before peeling backing. Choose one “center” leaf and build around it.
  • Clean the wall: Wipe with a dry microfiber cloth. Skip oily or glossy cleaners that can leave residue and reduce adhesion.
  • Apply slowly: Start from one edge and smooth outward to reduce bubbles.
  • Press the details: Use a soft card or squeegee wrapped in cloth to press along veins and tips for a painted-on look.
  • Step back often: Check spacing and rotation so leaves feel varied rather than patterned.

If you want more general removable décor inspiration (especially for rentals), HGTV has helpful ideas: https://www.hgtv.com/.

Removal, repositioning, and keeping walls looking good

One of the best parts of wall decals is the ability to adjust or remove them with minimal hassle. Take your time and treat paint gently.

Product spotlight: Large Nordic Green Leaf Wall Decals

If your goal is a calm, modern refresh, Large Nordic Green Leaf Wall Decals are an easy way to add a soft botanical statement without committing to paint or wallpaper. The large, modern leaf design fits minimalist and Scandinavian-inspired rooms, and the green tone pairs naturally with white, beige, light gray, and light wood furniture.

More in-stock picks to support the Nordic vibe

FAQ

Do wall decals damage paint when removed?

Usually not on smooth, well-bonded, fully cured paint. Peel slowly at a low angle, and use gentle heat on stubborn spots to help reduce stress on the paint layer.

Can these decals be used on textured walls?

Light texture may work with extra pressing, but heavy texture often reduces adhesion and can leave edges looking uneven. For the cleanest lines and longest hold, smoother surfaces perform best.

How long should new paint dry before applying wall decals?

Dry-to-touch isn’t the same as fully cured, and applying too soon can increase lifting risk. Follow the paint manufacturer’s curing guidance (often a few weeks) before installing decals.

Was this article helpful?

Yes No
Leave a comment
Top

Shopping cart

×