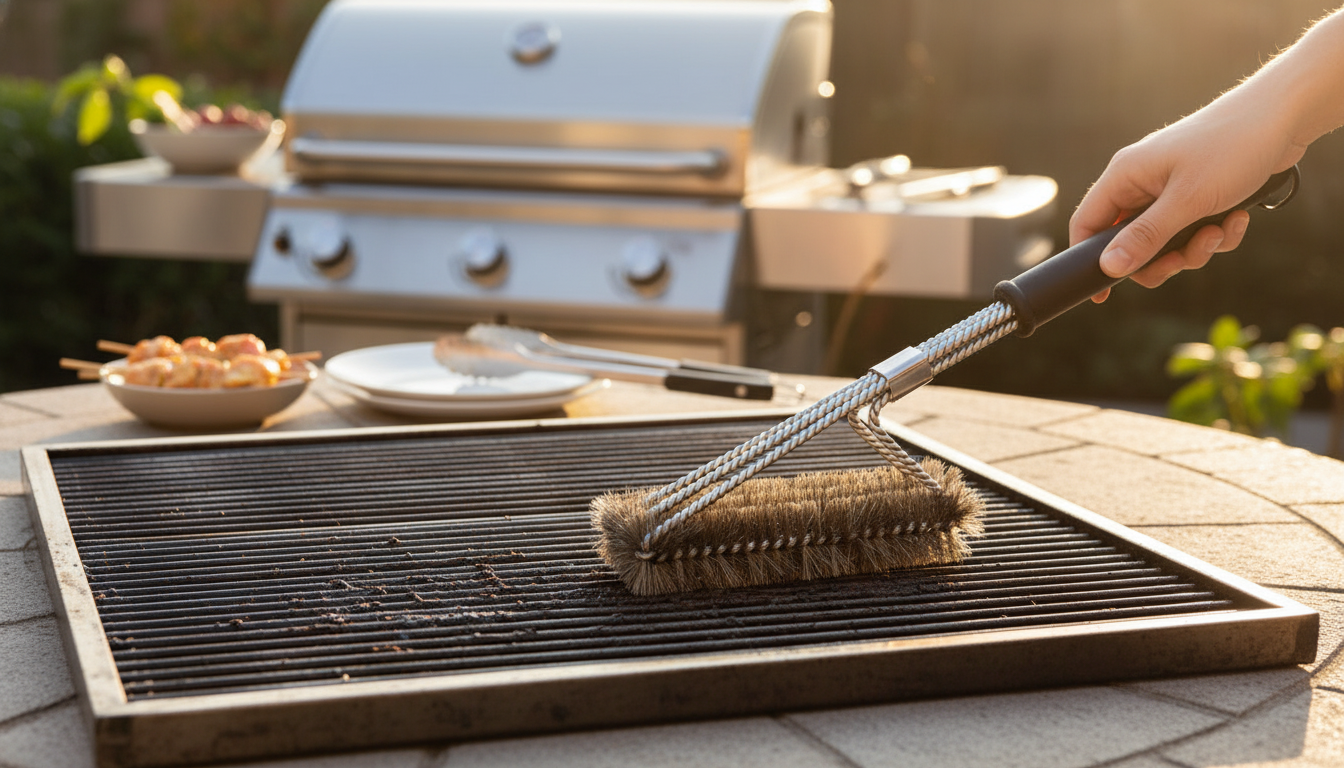
A reliable grill brush makes the difference between cooking on yesterday’s residue and starting fresh. A stainless steel BBQ grill brush with a handle is designed to scrub stuck-on buildup while keeping hands farther from heat and grime, helping grates stay cleaner, heat more evenly, and release food more easily. Cleaner grates also support better flavor—less old grease burning off under your food—and a more predictable sear.
Grill grates take a beating: fats drip, marinades caramelize, and flare-ups leave behind carbon. A purpose-built stainless steel grill brush focuses on the jobs that matter most for everyday grilling.
For a straightforward cleanup tool that fits into a typical grill toolkit, see the Stainless Steel BBQ Grill Brush with Handle.
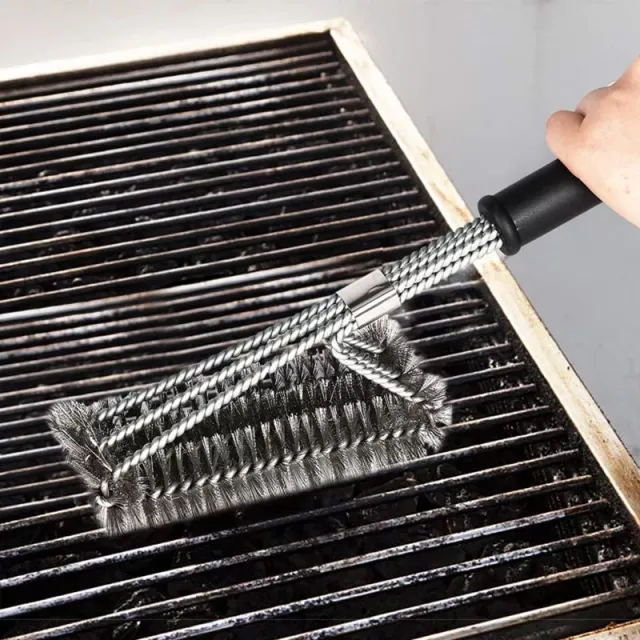
Stainless steel bristles are a common choice because they’re built for repeated, high-friction contact with baked-on residue. When used with the right technique, they can make quick work of the blackened layer that builds up after several cooks.
If you grill frequently, the “small” advantage is consistency: stiff bristles keep their shape longer, so you spend less time going over the same spot again and again.
The handle isn’t just about comfort—it changes the physics of cleaning. More reach and better leverage help you apply steady pressure without leaning too close to hot metal or reaching deep into the cook box.
This matters most when residue is stuck at the edges or where the grate meets the frame—areas that often require angled strokes and a controlled grip.
A simple routine keeps buildup from turning into an all-afternoon project. The goal is to loosen, scrub, then remove what you loosened so it doesn’t end up under your next cook.
For broader safety reminders around outdoor cooking, the NFPA’s grilling safety guidance is a helpful reference. For food-handling basics, the CDC food safety page and the USDA safe temperature chart can help you finish strong after cleanup and preheat.
No grill brush lasts forever, and replacement is part of safe, effective maintenance. Retire a brush early if it isn’t behaving predictably under pressure.
| Method | Best for | Pros | Watch-outs |
|---|---|---|---|
| Stainless steel bristle brush with handle | Routine scrubbing and stuck-on residue | Strong cleaning power; good reach and leverage | Inspect grates after brushing; replace if bristles shed |
| Nylon brush | Cool grates or lighter residue | Gentler feel; useful for some coated surfaces | Not for high heat; can wear faster on heavy buildup |
| Grill stone/block | Deep cleaning sessions | Effective on stubborn carbon layers | Can crumble; may leave dust—wipe grates thoroughly |
| Scraper or coil-style scrubber | Targeted spots and edge buildup | No bristles; good control for corners | May require more effort on large areas |
Warm grates often release residue more easily. Heat briefly to loosen buildup, then reduce heat or turn off the grill before scrubbing; finish by wiping the grate to remove loosened debris.
Use light pressure and controlled strokes to help avoid scratching or chipping. If the coating is delicate or already damaged, consider a gentler alternative and always wipe and inspect grates before cooking.
Replace it when bristles bend, break, or shed; when the head loosens; or when corrosion becomes significant. A quick inspection before each use is the simplest rule for safer use.


Leave a comment